FTSLED / Blog
Cerise x Astera in Blackout: complete setup guide
2026-09-27
The ART7 AsteraBox WIFI is Astera's gateway to its fixtures. It gives you control that DMX can't, such as battery levels and fixture settings like the DMX profile or address. Blackout can now connect to it directly, so you can manage your Astera fixtures from the same iPad that runs your show.
Cerise keeps doing what it does best: sending your DMX over CRMX. The ART7 handles fixture setup and monitoring over Wi-Fi, so the two work side by side.
There are two ways to connect Blackout to the ART7:
- Access Point: the ART7 creates its own Wi-Fi network and the iPad joins it, while Cerise stays plugged into the iPad over USB. This is the quickest setup, ideal for a single iPad.
- Join Network: the ART7 joins your router's 2.4 GHz network. The iPad connects to the same router, even on its 5 GHz network, and Cerise can stay on the iPad or be connected to the router as well. This suits larger setups.
What you need
- An ART7 AsteraBox WIFI with firmware 5.16.24 or later, and the AsteraNext app for the initial setup
- Blackout on your iPad
- Cerise with firmware 1.8.11, with your Astera fixtures linked to it over CRMX (see Blackout setup in the user guide)
- The ART7's Pairing PIN, printed on the sticker on its back
- For Join Network: a dual-band router with a 2.4 GHz network
Keep the ART7 at least 30 cm (1 ft) away from Cerise, as both use the 2.4 GHz band.
Access Point: step by step
1. Update the ART7
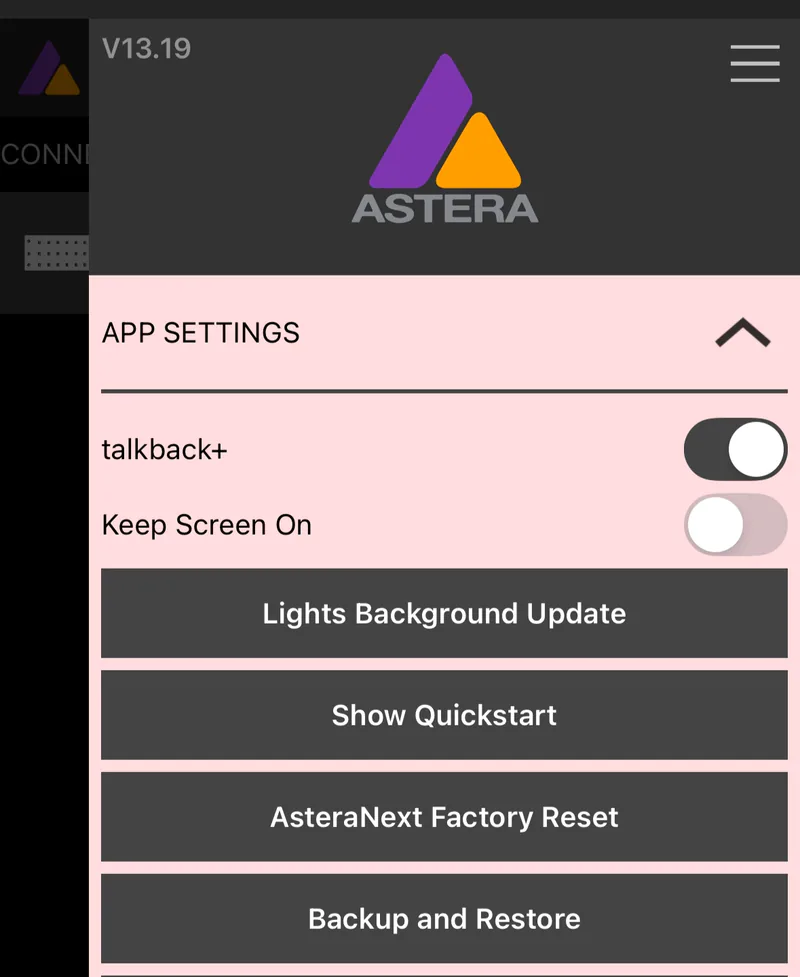
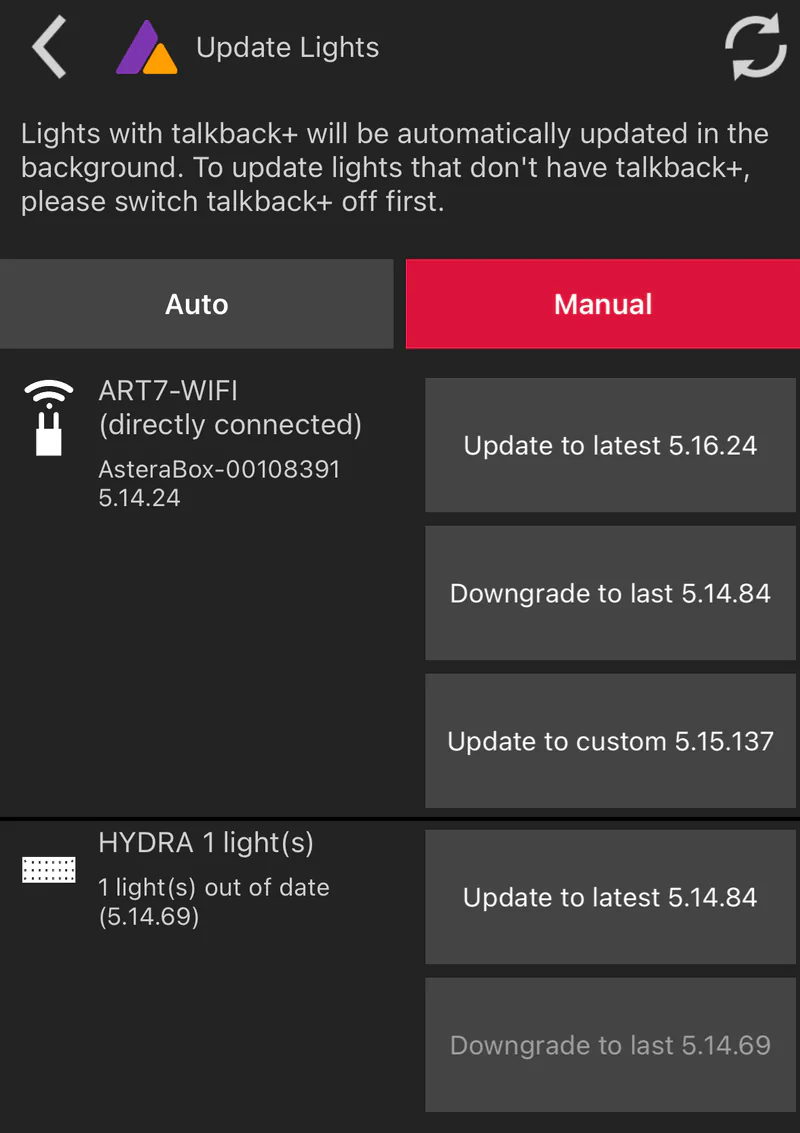
Connect to the ART7 over Bluetooth in AsteraNext. In the app menu, open App Settings › Lights Background Update. On the Manual tab, update the ART7 to 5.16.24 or later.
2. Turn on the access point
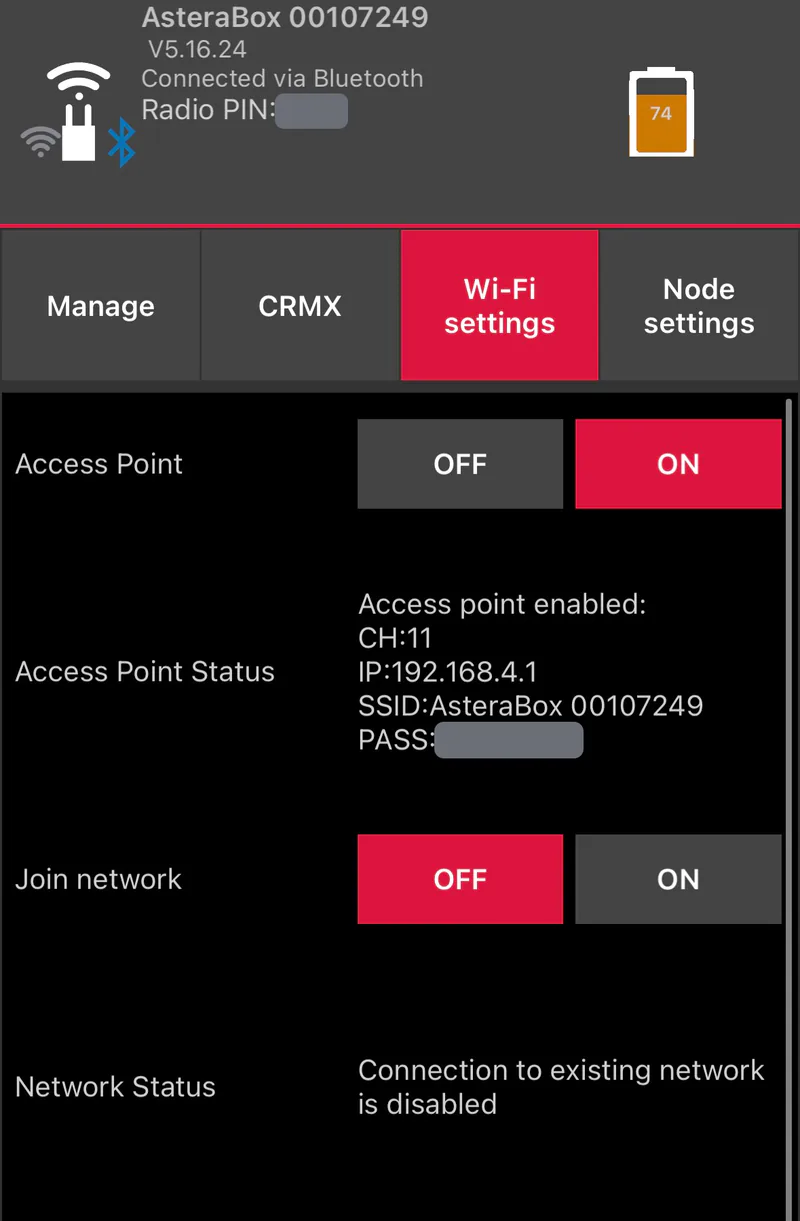
In the ART7's Wi-Fi settings tab, set Access Point to ON and Join network to OFF.
3. Restart the ART7
Switch the ART7 off, then on again. Don't skip this step: the new Wi-Fi settings only apply after a restart.
Reconnect to it over Bluetooth in AsteraNext and write down:
- CH: the Wi-Fi channel the ART7 uses (usually 11)
- SSID and PASS: the name and password of its Wi-Fi network. The password is usually the Pairing PIN with two zeros in front.
- Radio PIN: shown at the top of the screen
4. Close AsteraNext
Fully close AsteraNext by swiping it away in the app switcher. The ART7 can't be connected to AsteraNext and Blackout at the same time.
5. Set up Cerise
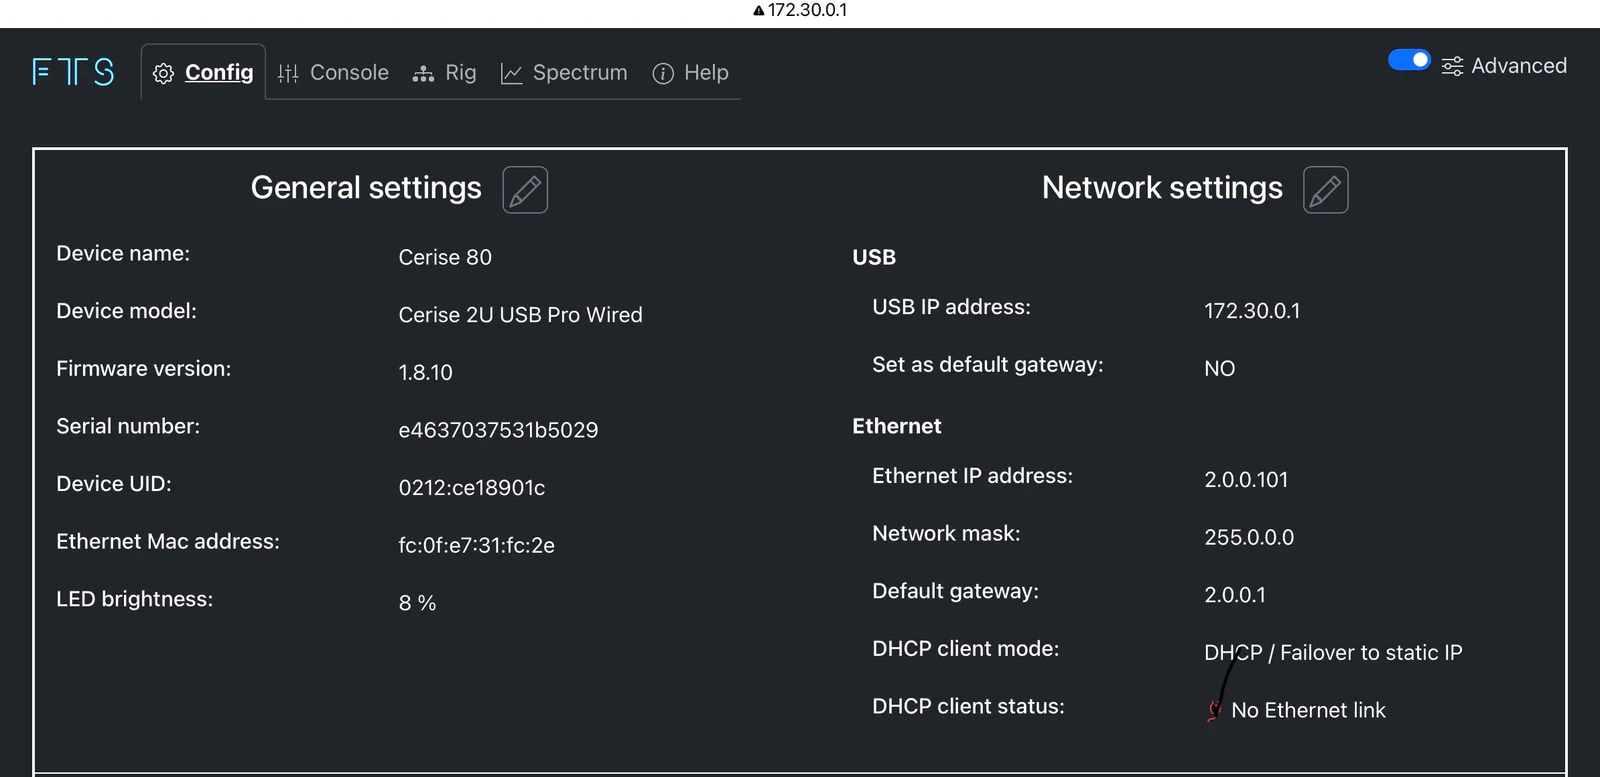
With Cerise plugged into the iPad, open its WebUI in Google Chrome. With firmware 1.8.11, the address is 172.30.0.1 by default (how to update).
Under Network settings, check that Set as default gateway is NO for USB. Otherwise the iPad has two gateways, Cerise and the ART7, which causes conflicts.
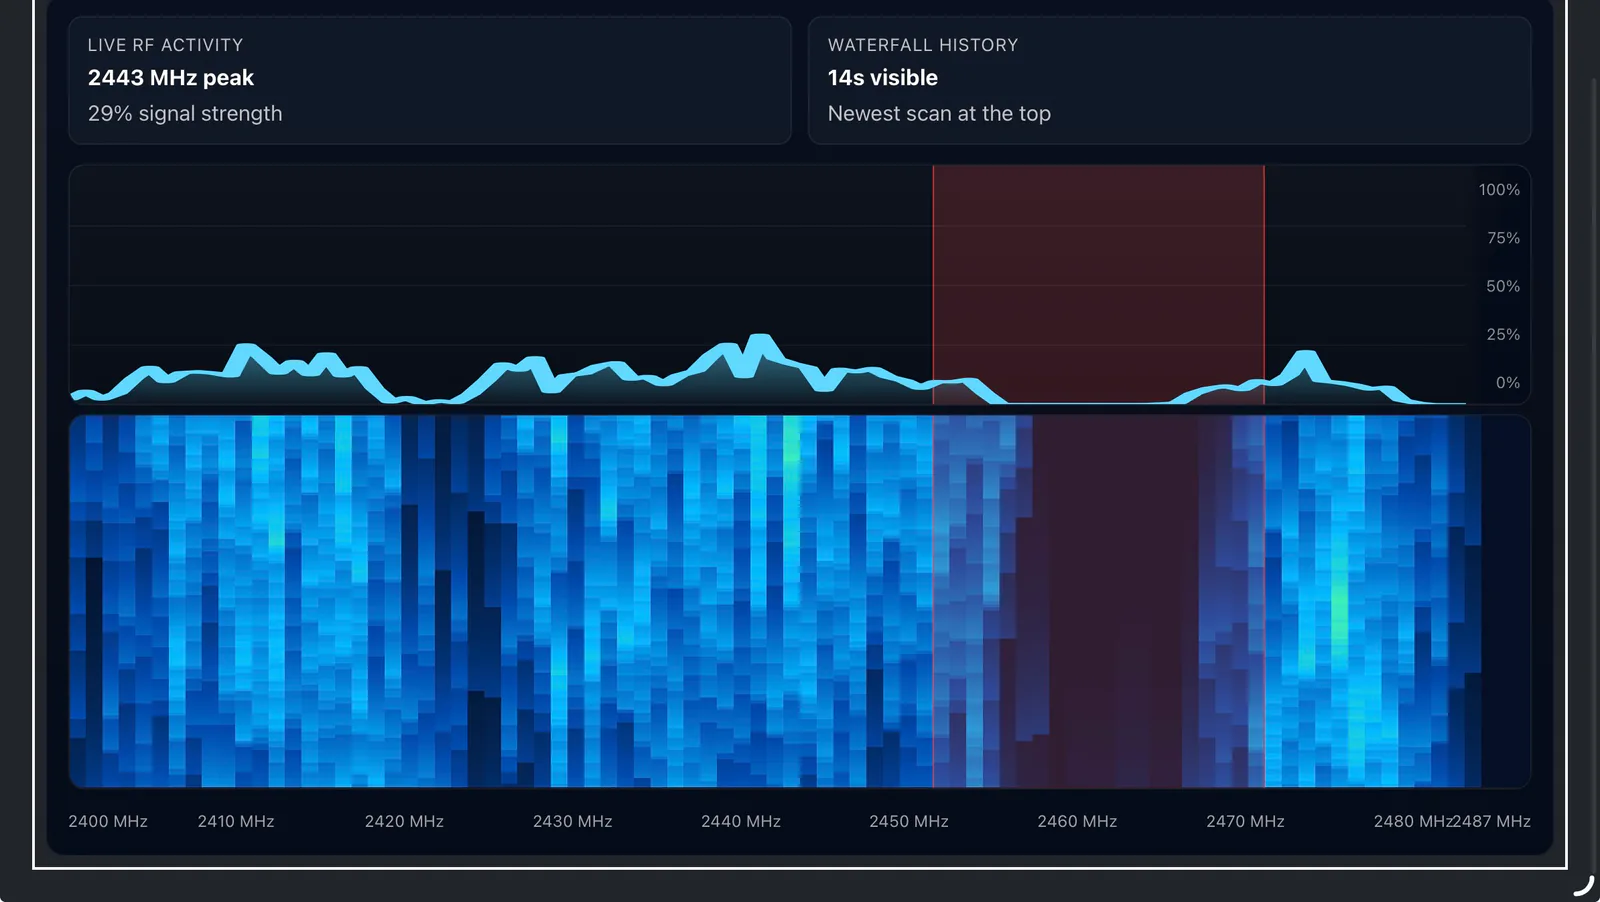
In the Spectrum tab, block the ART7's Wi-Fi channel from step 3 on all outputs (here WiFi / IEEE 802.11 2.4 GHz, Channel 11, 20 MHz). Cerise's CRMX then stays clear of the channel the ART7 uses. The blocked range shows in red on the spectrum. On the 1U, the Spectrum tab needs firmware 1.8.11.

6. Join the ART7's Wi-Fi network
In the iPad's Wi-Fi settings, join the ART7's network (the SSID from step 3) with its password.
7. Connect Blackout to the ART7
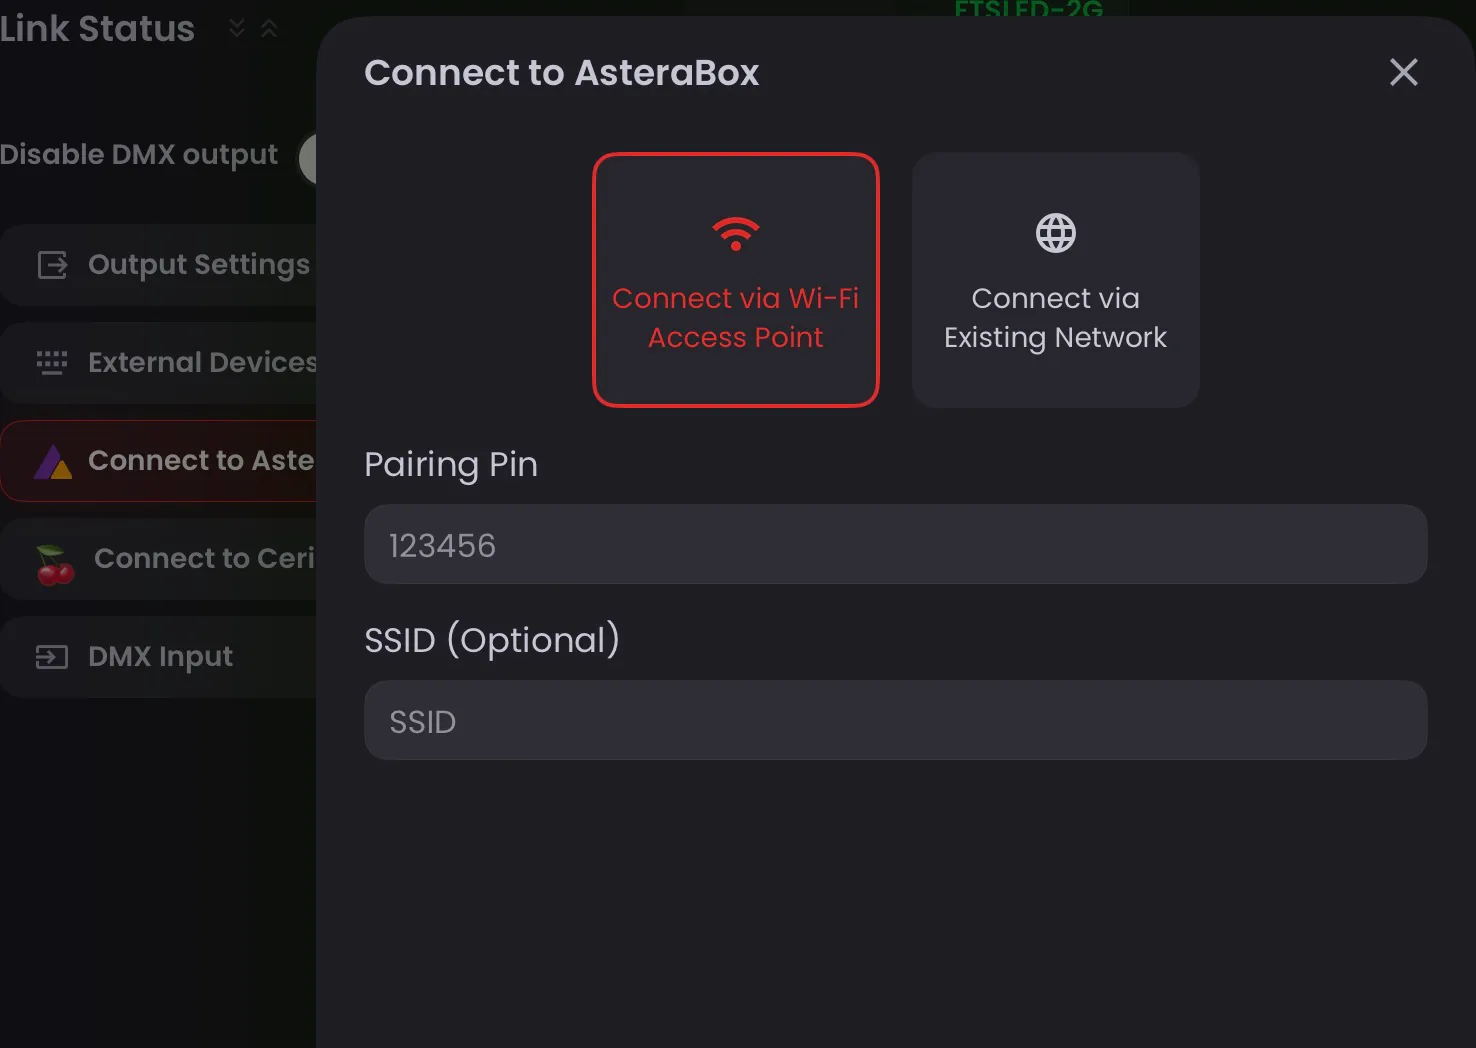
- In Blackout, open Link Status › Connect to Astera and tap + New Connection.
- Choose Connect via Wi-Fi Access Point and enter the Pairing Pin.
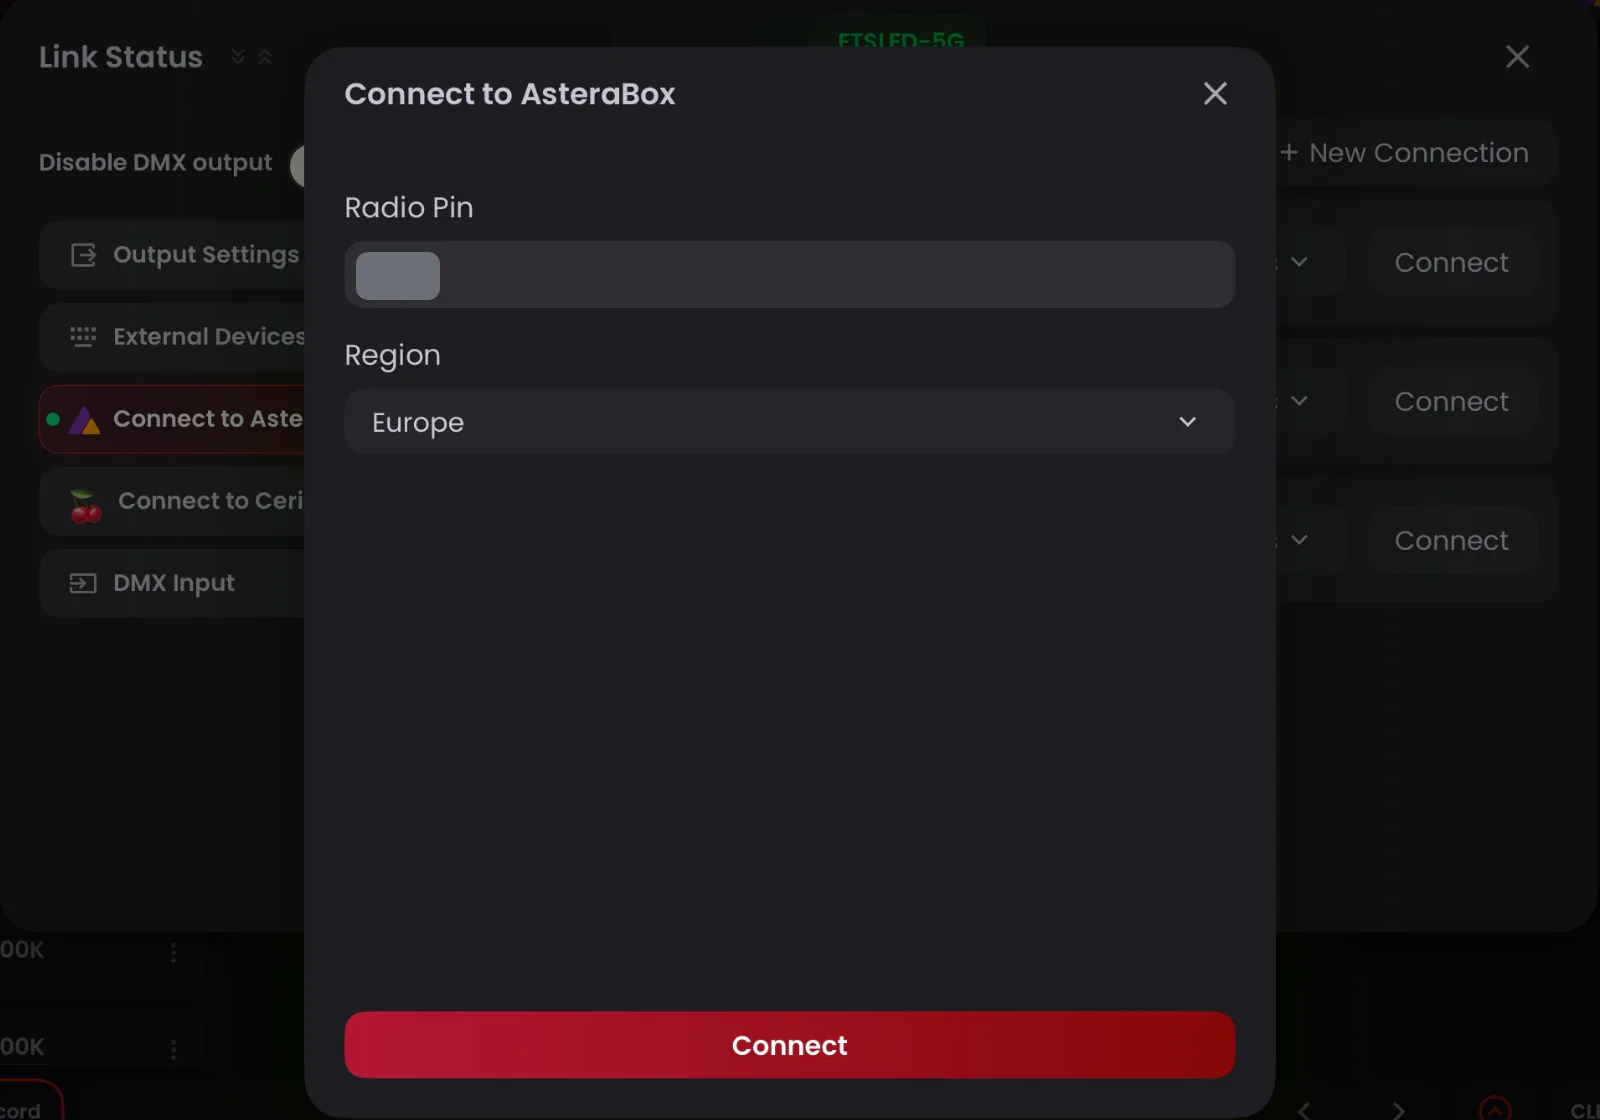
- Enter the Radio Pin, choose your Region and tap Connect.
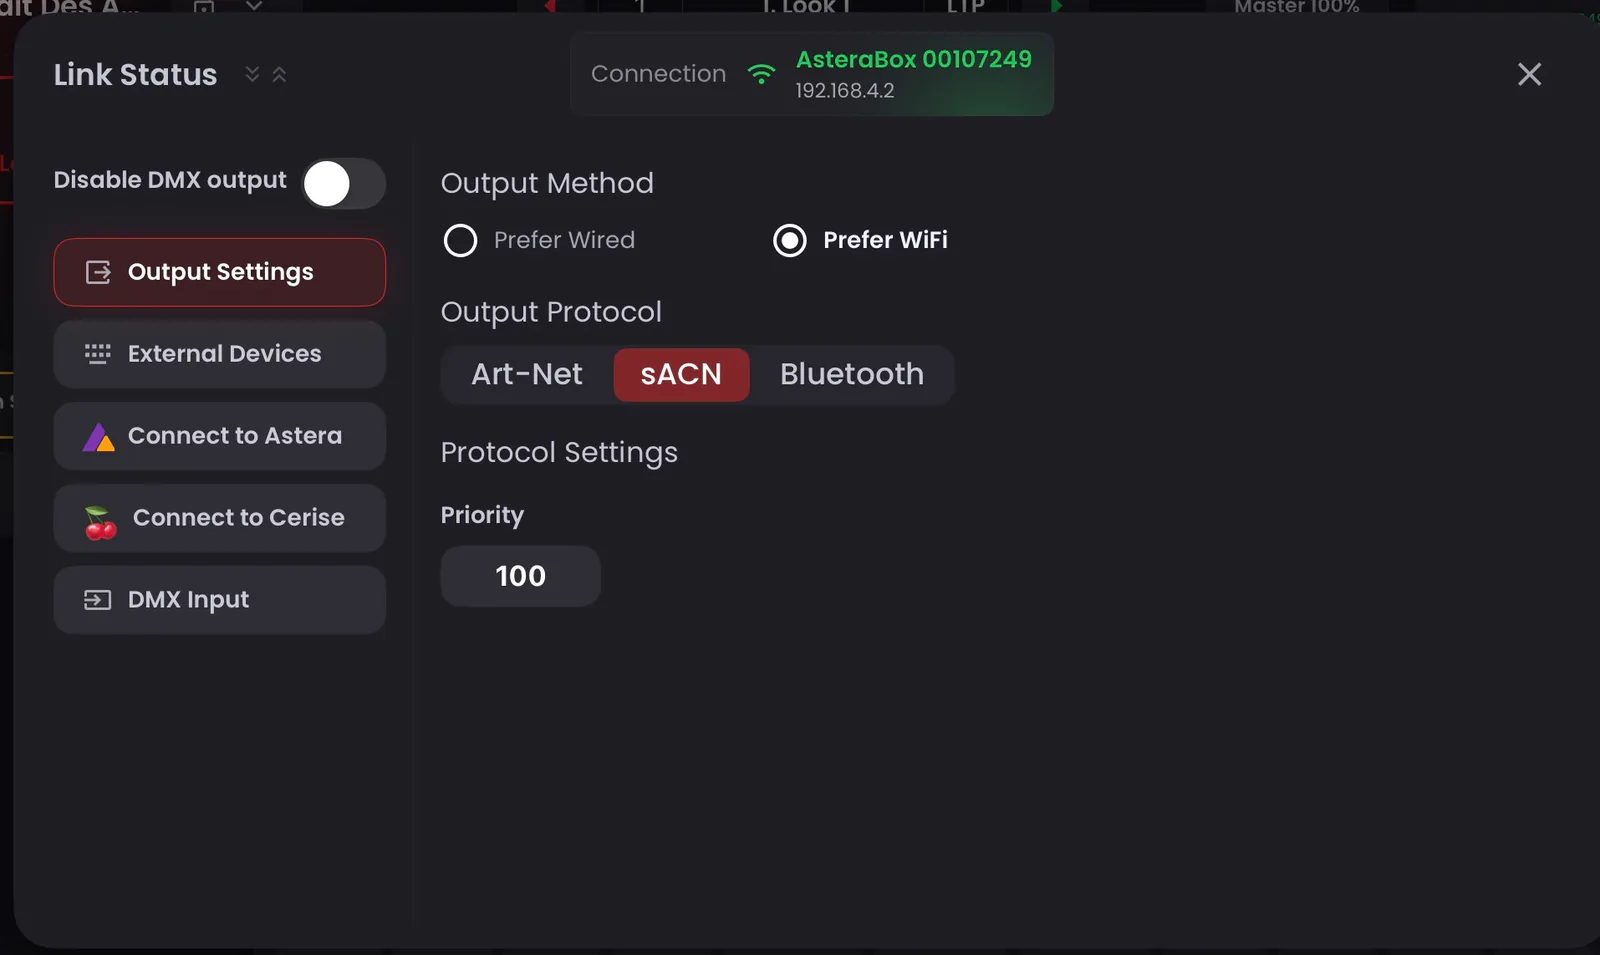
- In Output Settings, check that Output Method is set to Prefer Wired, so your DMX keeps going out through Cerise.
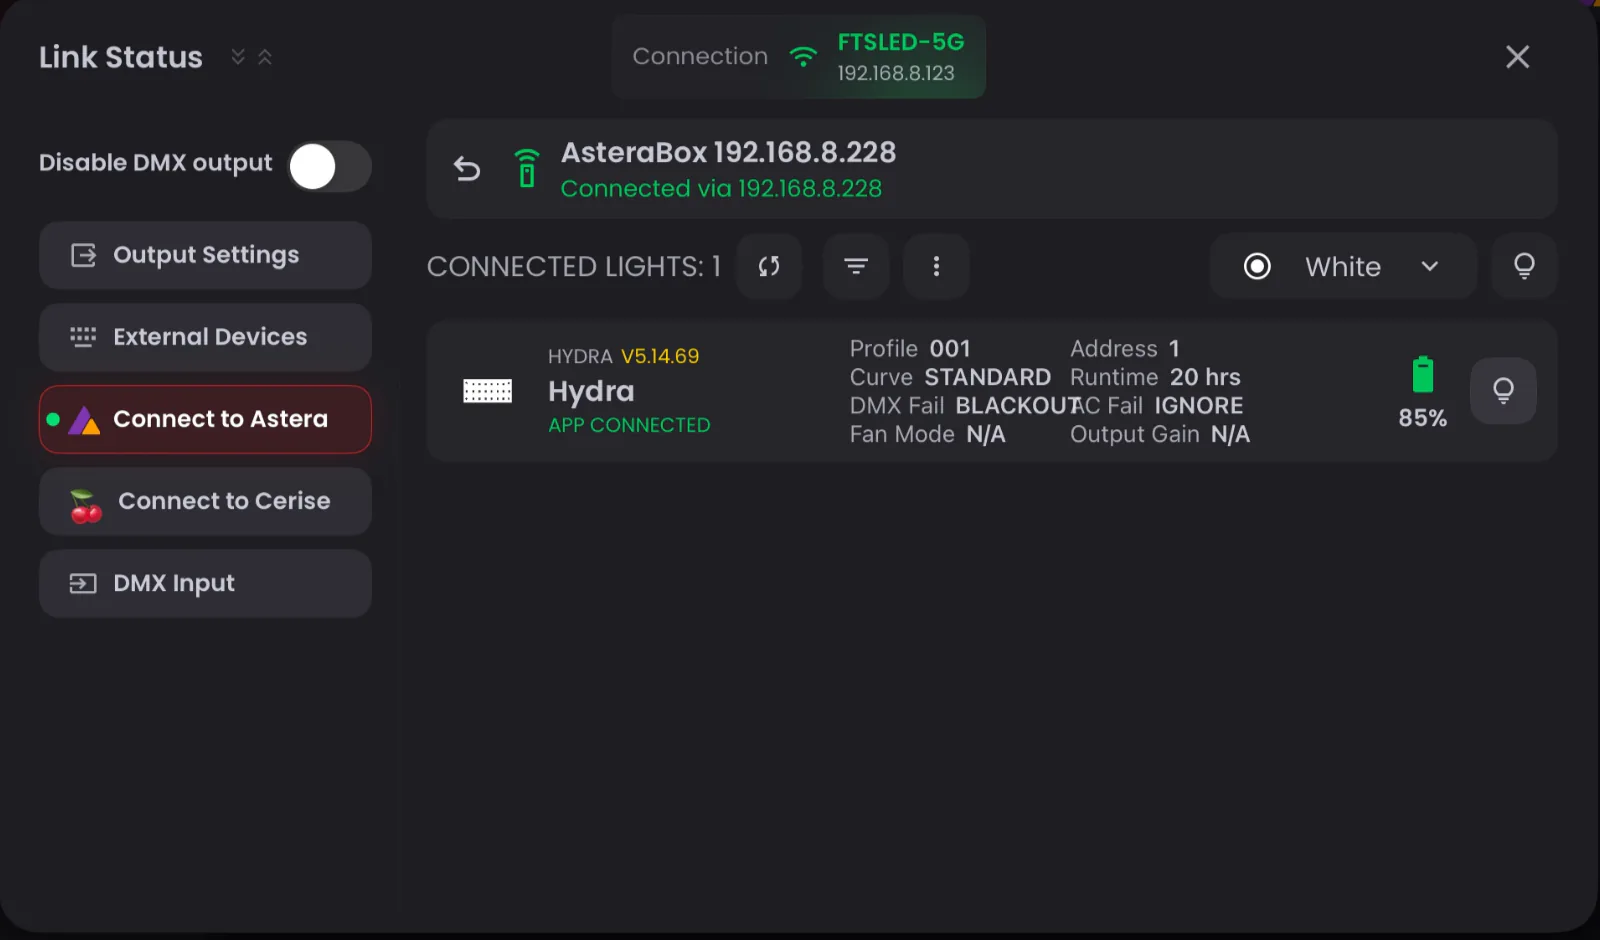
Once connected, Connect to Astera shows a green dot, and the ART7 appears with its Radio Pin and battery level.
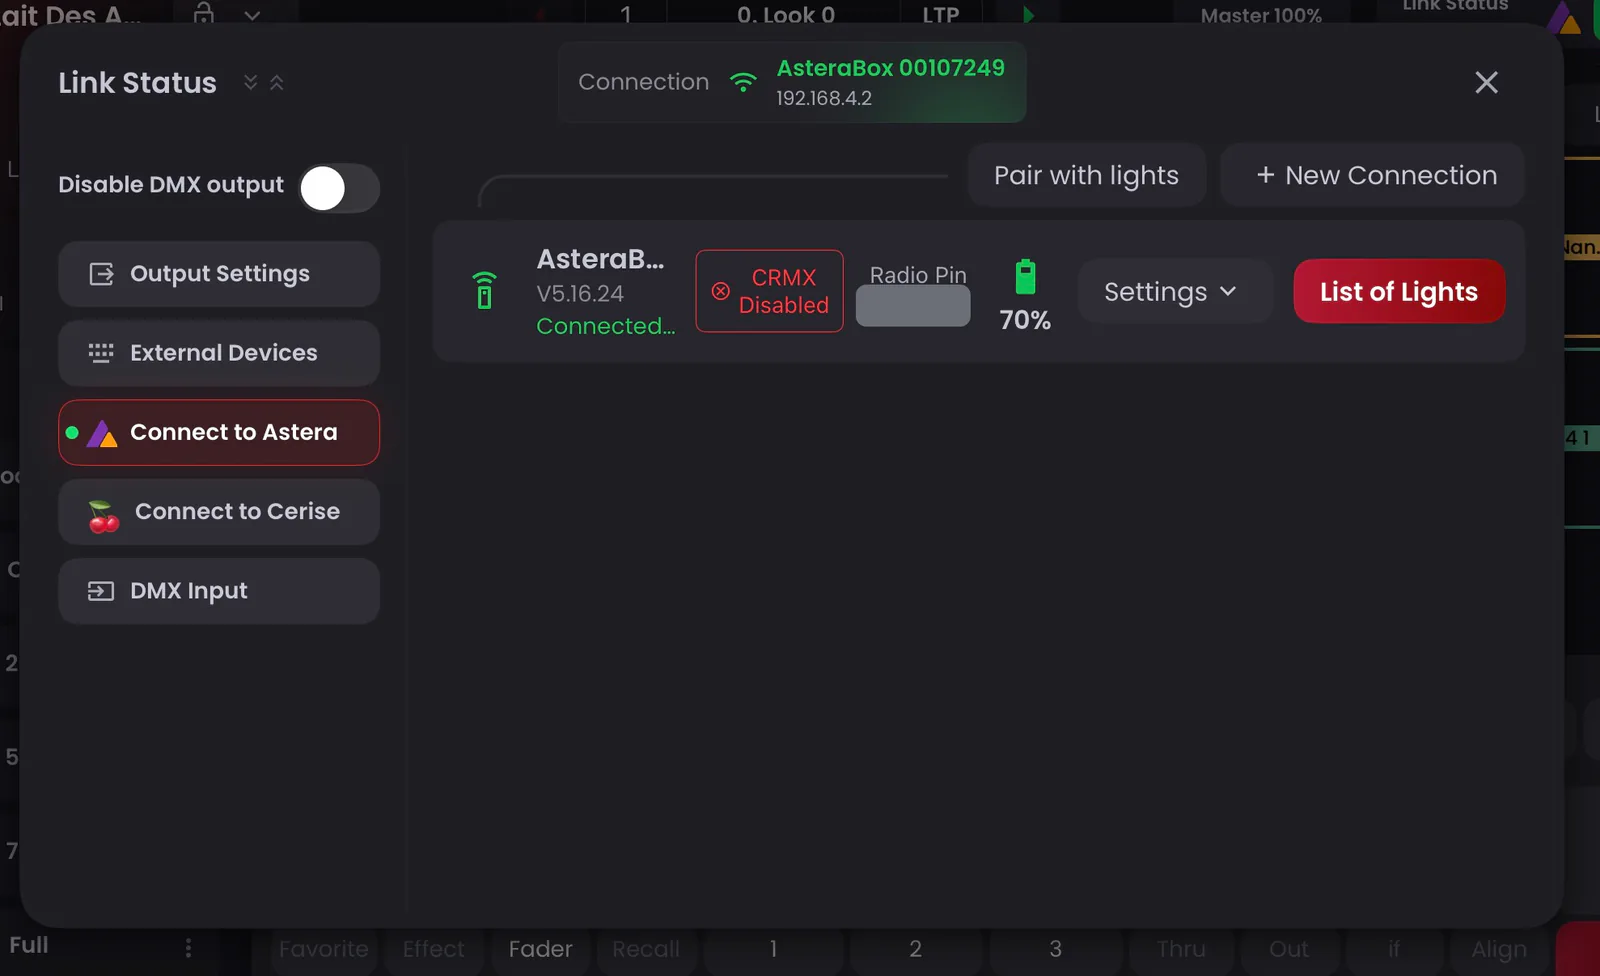
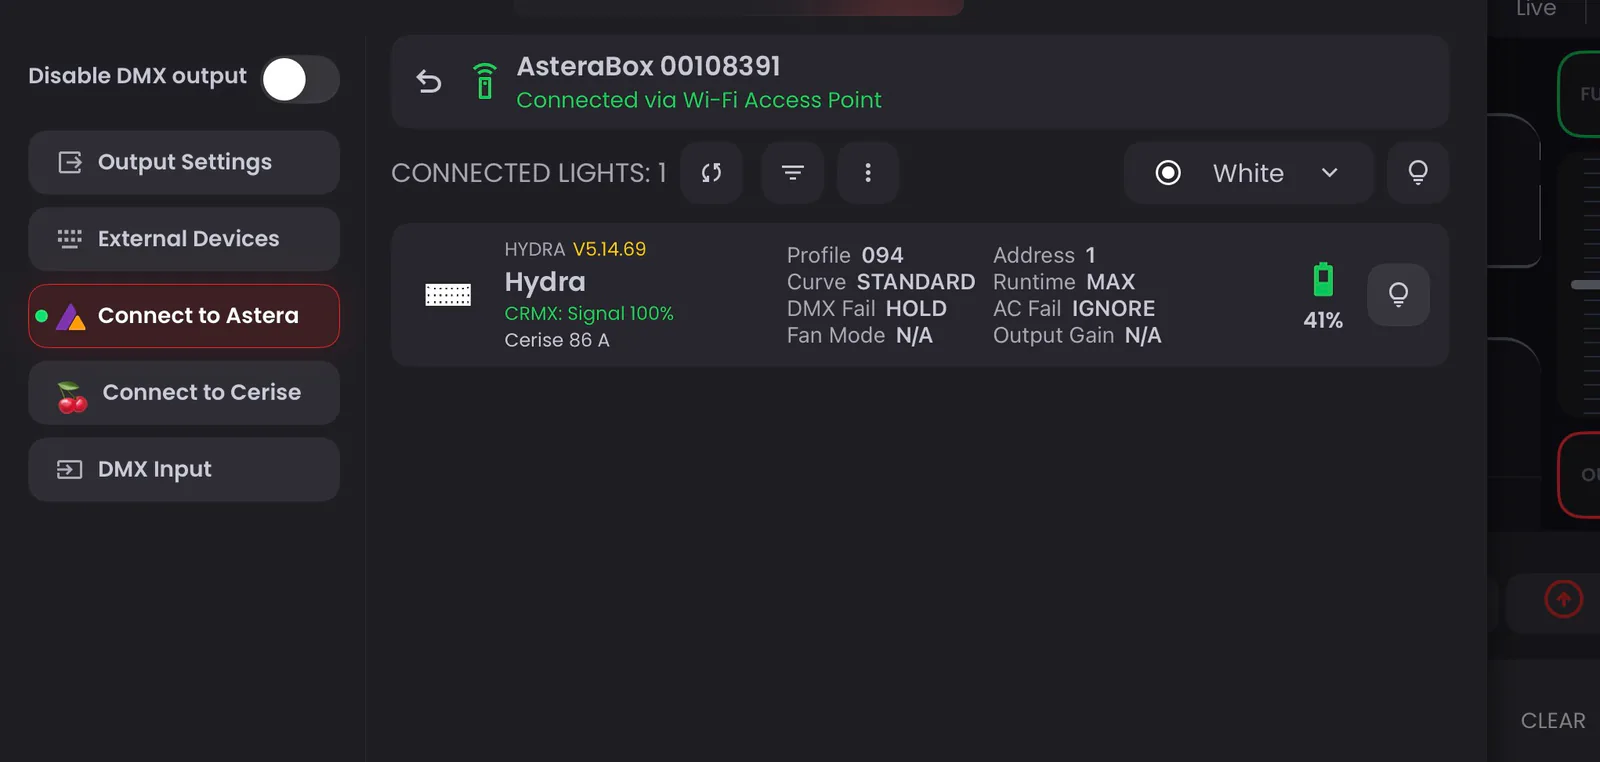
Open List of Lights: the Astera fixtures paired with the ART7 should appear. In this example, the Hydra receives its DMX from Cerise output A over CRMX, while Blackout reads its settings and battery through the ART7. If the list stays empty, Blackout isn't really connected or the link is suffering from interference.
If Blackout loses the ART7
If Blackout disconnects from the ART7 while you're working with Cerise, first check that the ART7 is on and that the iPad is back on its Wi-Fi network. Then either:
- In Link Status › Output Settings, set Output Method to Prefer WiFi for a moment. Go to Connect to Astera and tap Connect. Once you're connected, set Output Method back to Prefer Wired.
- Or close Blackout completely and open it again. It reconnects to the ART7 on its own.
From our testing, we recommend never using Reset on the ART7 from the Connect to Astera menu.
Join Network: step by step
In this mode the ART7 joins your router's Wi-Fi network instead of creating its own. The iPad connects to the same router, and Cerise can either stay plugged into the iPad over USB or be connected to the router as well.
1. Connect the ART7 to your router
Make sure your router is on and has a 2.4 GHz network: the ART7's Wi-Fi only works on 2.4 GHz. The iPad can still use the router's 5 GHz network.
Connect to the ART7 over Bluetooth in AsteraNext and check that its firmware is 5.16.24 or later (see step 1 of the Access Point setup). Then, in the Wi-Fi settings tab:
- Set Access Point to OFF and Join network to ON.
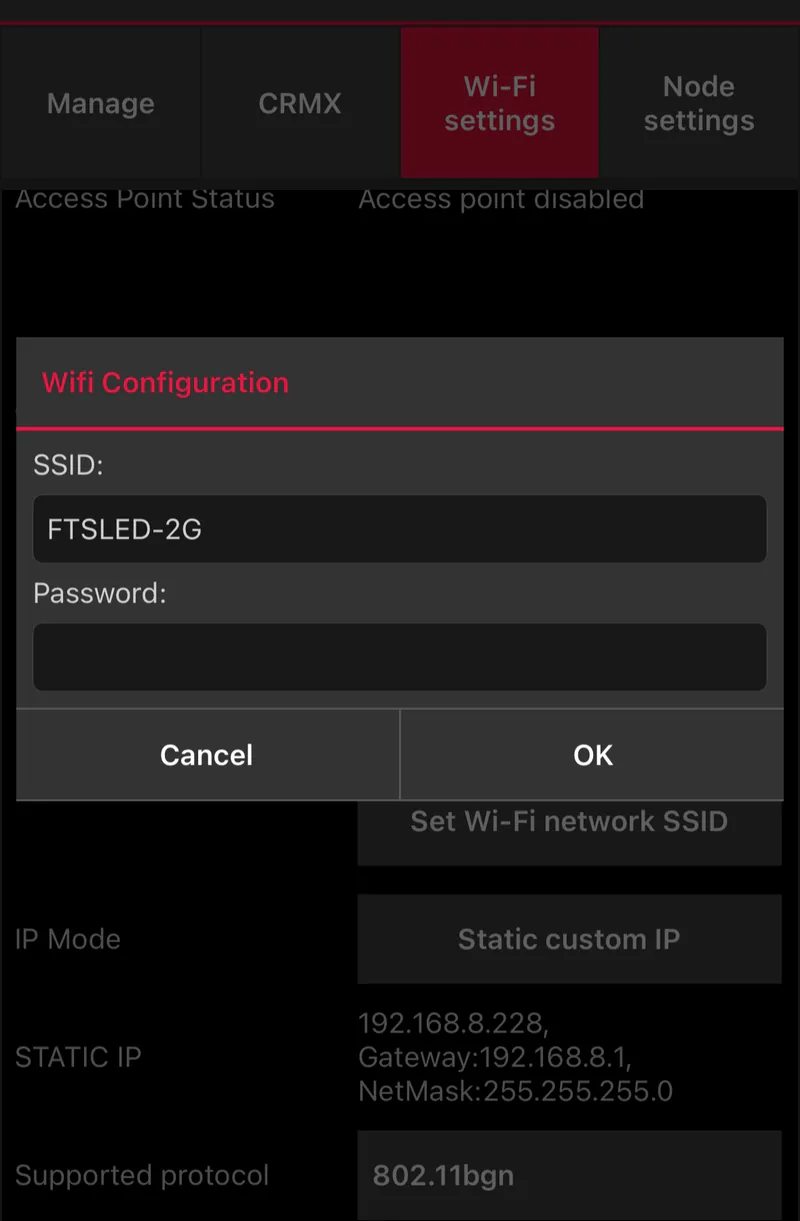
- Tap Set Wi-Fi network SSID and enter the name and password of your router's 2.4 GHz network.
2. Restart the ART7
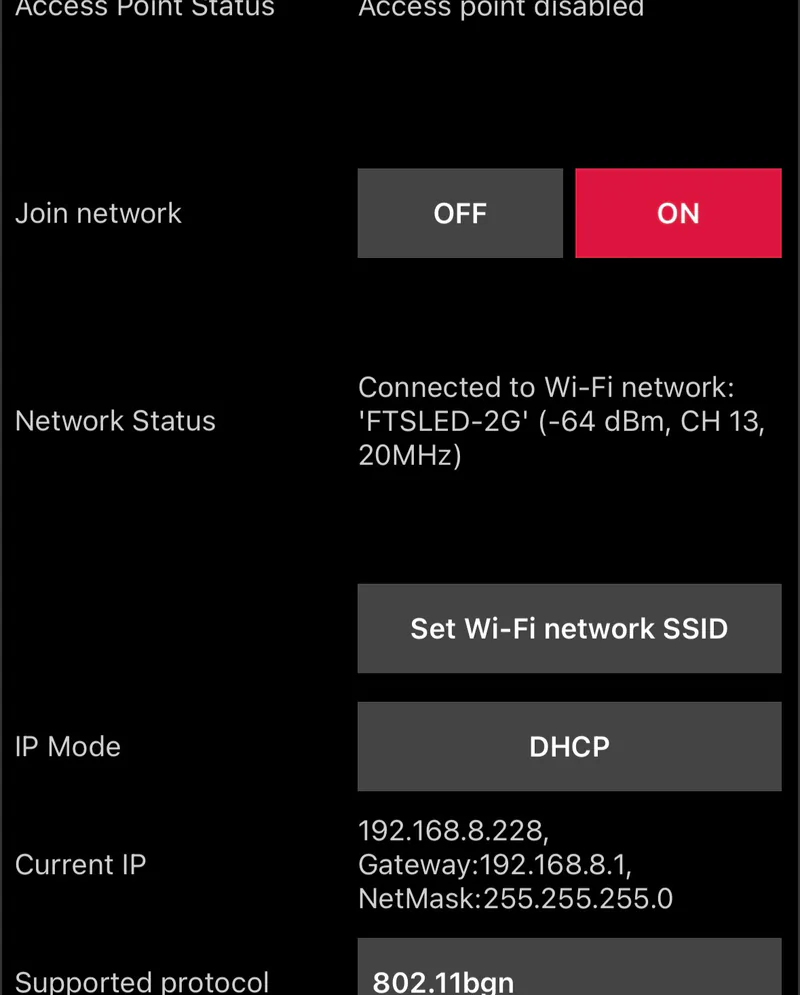
Switch the ART7 off, then on again (don't skip this), and reconnect to it over Bluetooth. Network Status should now show that it's connected to your network. Write down:
- the Wi-Fi channel shown in Network Status (here CH 13), which is your router's 2.4 GHz channel
- the Radio PIN
3. Give the ART7 a fixed IP address
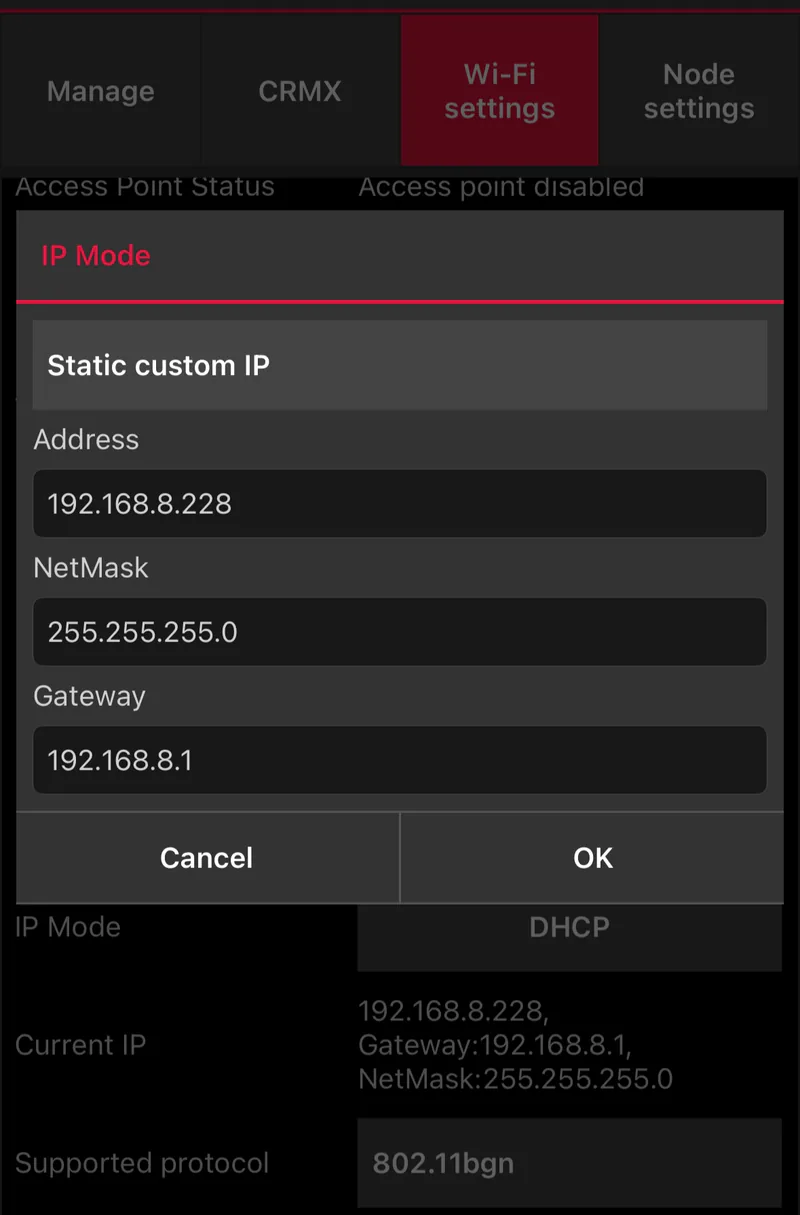
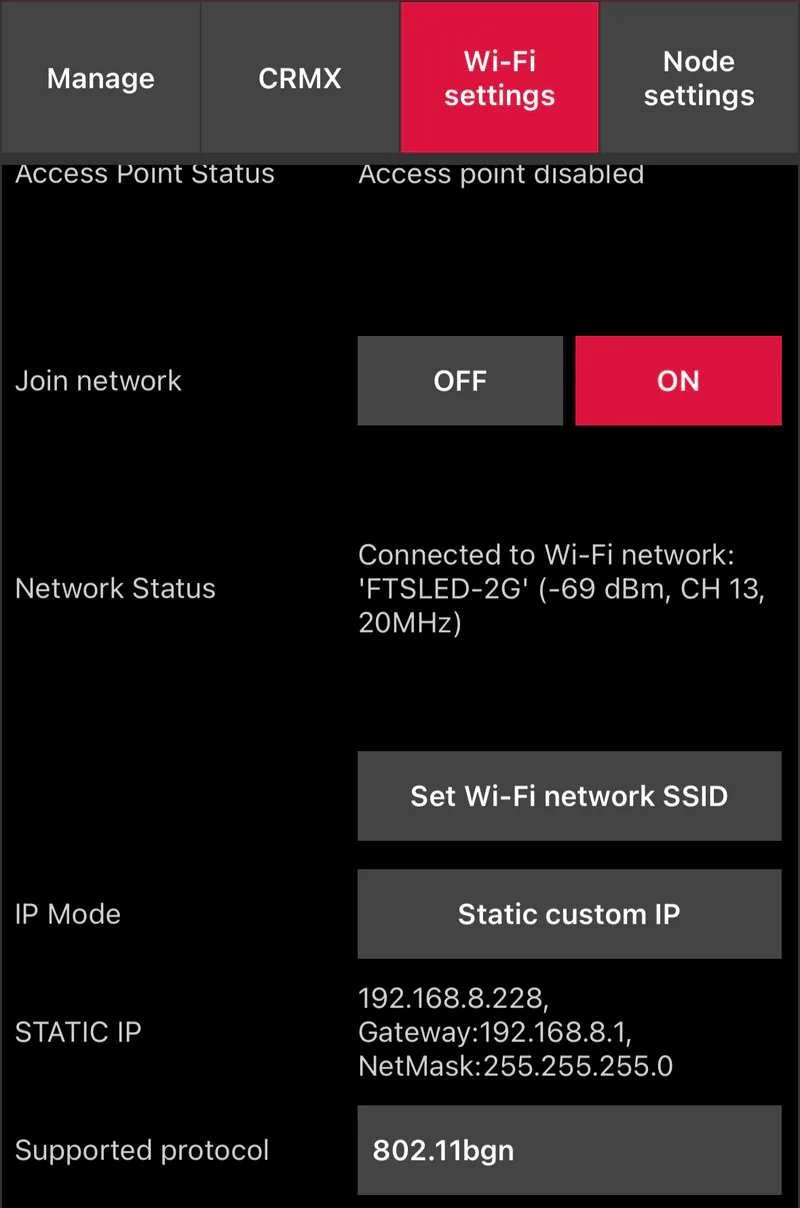
Set IP Mode to Static custom IP. The simplest option is to keep the address, netmask and gateway that the router gave the ART7 (here 192.168.8.228, 255.255.255.0 and 192.168.8.1).
We strongly recommend this: with DHCP, the ART7's address can change whenever it or the router restarts, and Blackout stores a single IP address for the connection. To be safe, use an address outside your router's DHCP range, or reserve it in the router, so it's never given to another device.
4. Restart the ART7 and close AsteraNext
Switch the ART7 off and on again, then fully close AsteraNext.
5. Set up Cerise
Connect the iPad to your router's Wi-Fi. Cerise can then be connected in one of two ways:
- Plugged into the iPad over USB: set it up as in step 5 of the Access Point setup, with Set as default gateway on NO.
- Connected to the router, over USB or over Ethernet (2U and 4U): follow our Wi-Fi guide. Over Ethernet, Cerise gets its address from the router (DHCP) by default. You'll find it in the list of connected devices on your router's admin page, usually at the address ending in .1 (192.168.8.1 on GL.iNet routers).
Either way, in the Spectrum tab, block your router's 2.4 GHz channel (from step 2) on all outputs.
Give your router's 2.4 GHz network a fixed channel rather than an automatic one. Otherwise the router can change channel after a restart, and Cerise would be blocking the wrong one. The Wi-Fi guide also has tips for a more reliable Wi-Fi link.
6. Connect Blackout to the ART7
- In Blackout, open Link Status › Connect to Astera and tap + New Connection.
- Choose Connect via Existing Network, then enter the Pairing Pin and the ART7's IP Address.
- Enter the Radio Pin, choose your Region and tap Connect.
- If Cerise is plugged into the iPad, check in Output Settings that Output Method is set to Prefer Wired. If Cerise is connected to the router, set up Blackout's output as described in the Wi-Fi guide.
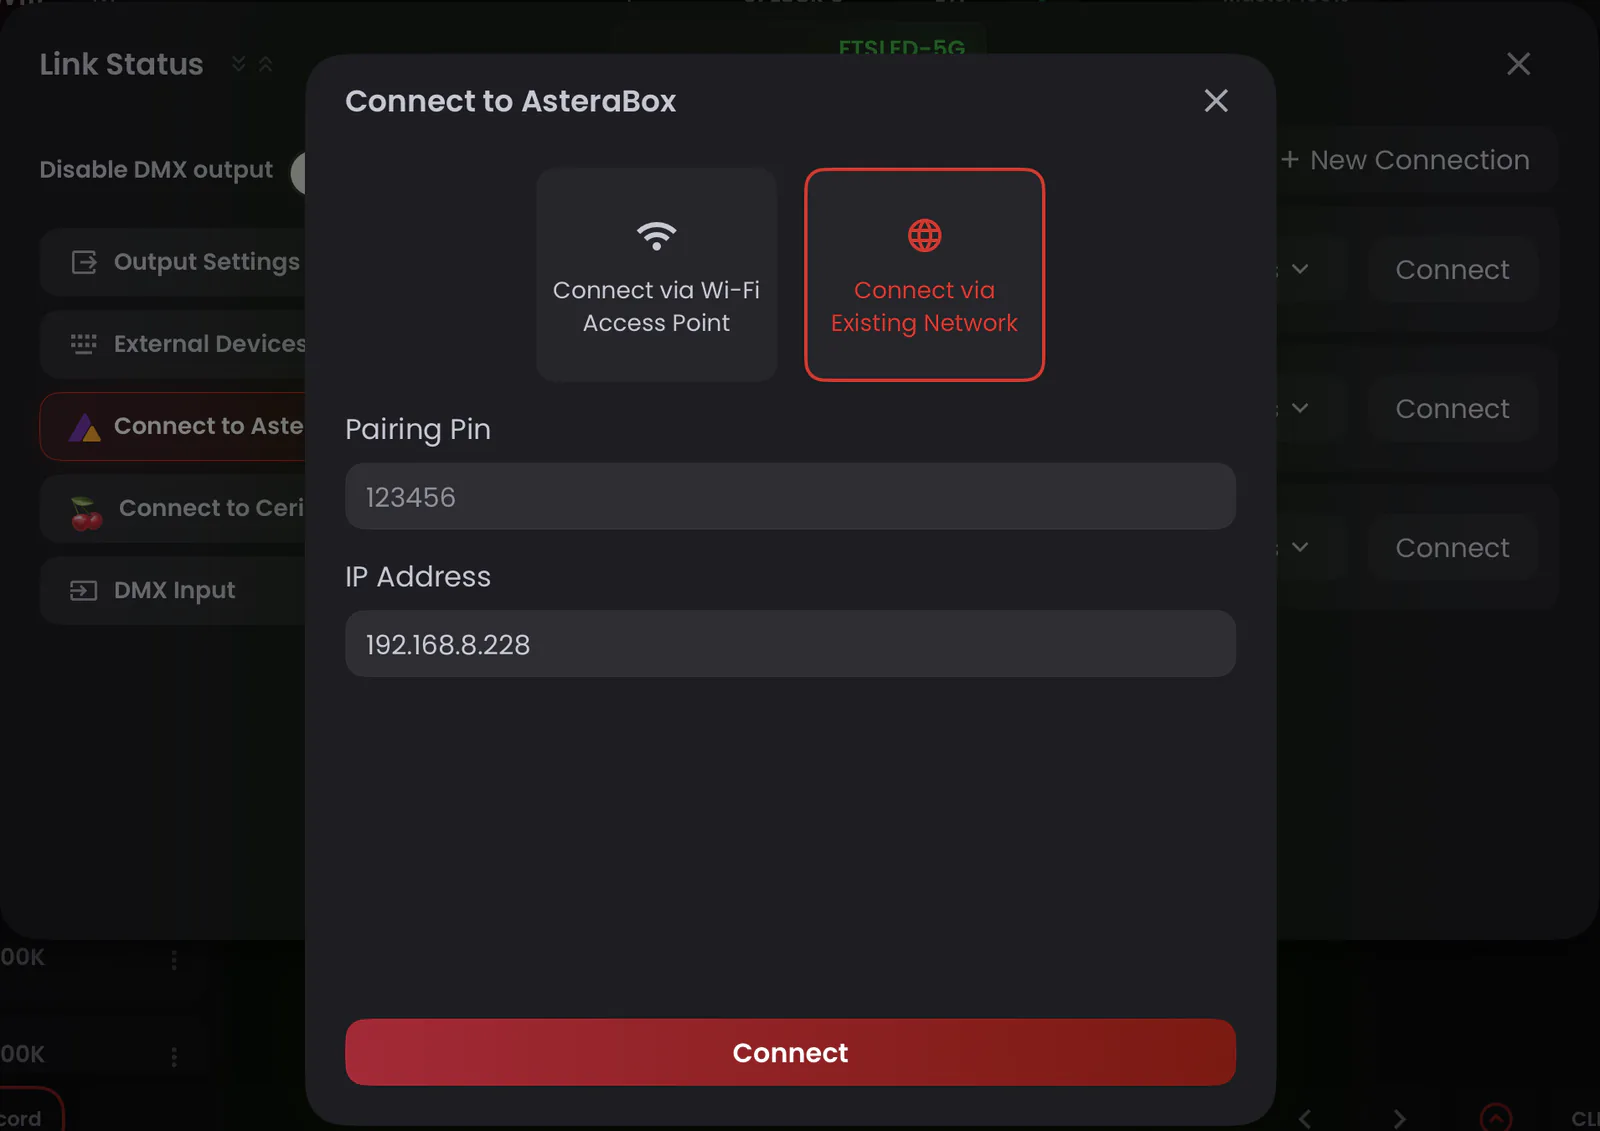
Your Astera fixtures appear in List of Lights, just like in the Access Point setup. The iPad doesn't need to be on the same band as the ART7: here, Blackout is connected through the router's 5 GHz network while the ART7 uses 2.4 GHz.
If Blackout loses the ART7, follow the same steps as for the Access Point setup.
Sources: